Installation
In this section we will talk about installation and setup. It's extremely simple and can be done in 4 steps.
Tip
It's highly advised to learn how to install a mod for Skyrim before starting to read this step-by-step guide. It requires you to install a few mods and if they are not installed properly, you can't play the mod.
Step 0: Install the Prerequisites
You need some hard mod requirements to make this run properly as a mod. I won't go over and explain how to install each, please carefully read and install all of them.
Required Mods:
Note: None of them are optional this means you NEED to download and install all of them carefully.
Step 1: Install Mod
Here is a quick step-by-step information
- Download the mod from nexusmods.
- Extract mod .zip/.rar file to a folder (Use Winrar, WinZip, 7Zip, up to you)
- Once you extract it, folder called
InworldSkyrimshould be like this:

- Great. Now go to your game's installation path. It should be similar to
Steam\steamapps\common\Skyrim Anniversary Editionbut if you are unable to find it and if you are using Steam, open Steam, right click to game,Properties -> Local Files -> Browseand it will open the location. - Now copy both of the folders (Data and Inworld folders) to your game directory
- Congrats. You just installed the mod 🚀️
Step 2: Create Inworld Account
Mod is using Inworld's great AI and TTS system. This means you need one too. But don't worry, it's quite easy to setup an account. It's also very new-user friendly.
Go to inworld.ai And you should be seeing something like this:

Great now click GET STARTED and it should redirect you to a page similar to this:

Now click to Sign-up with email and complete your signup process.
Note that I said Sign up with email - don't select the other options because they won't work.
Beware!
This part is important. You should select Sign-up with email not the other options!
Step 3: Setting up Workspace
Congrats. You are signed up for Inworld! If you are new user, inworld will redirect you to a shared workspace. Something like this (with different name and more characters)

Now we don't want this workspace, so you should create a new one. For this, Click the Change on the left side. This will open a page similar to this
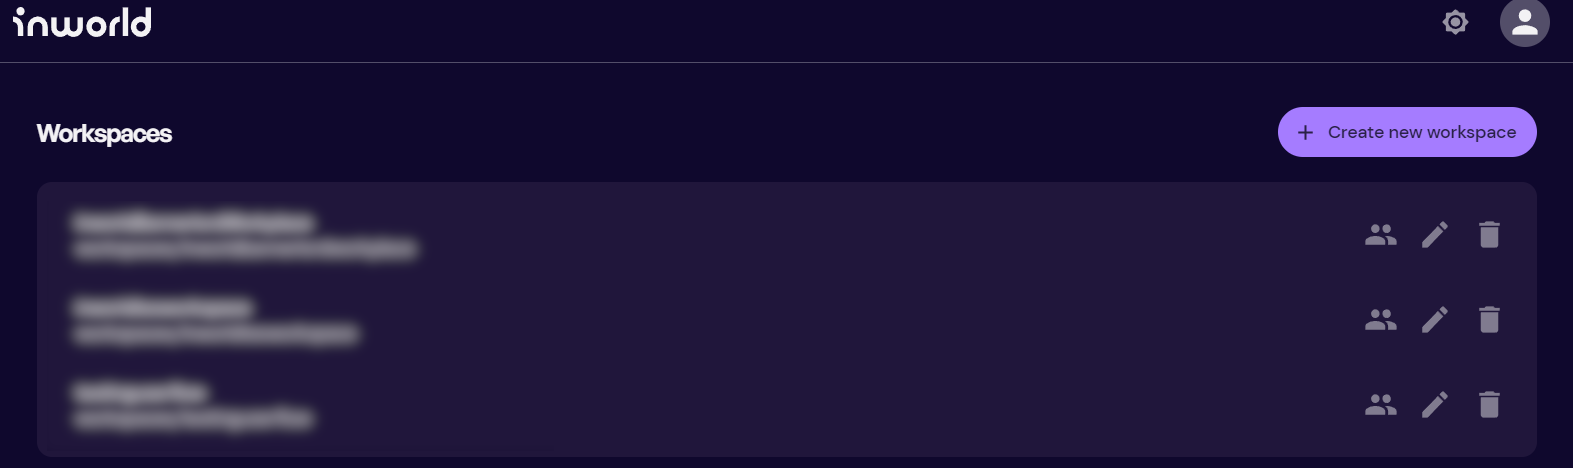
You will probably see only a single workspace in here. So we need to create a new one. Click to Create new workspace button and it will redirect you to a page similar to this. Add your workspace name and click Save but make sure that you copy your Workspace id to somewhere, we will need that.
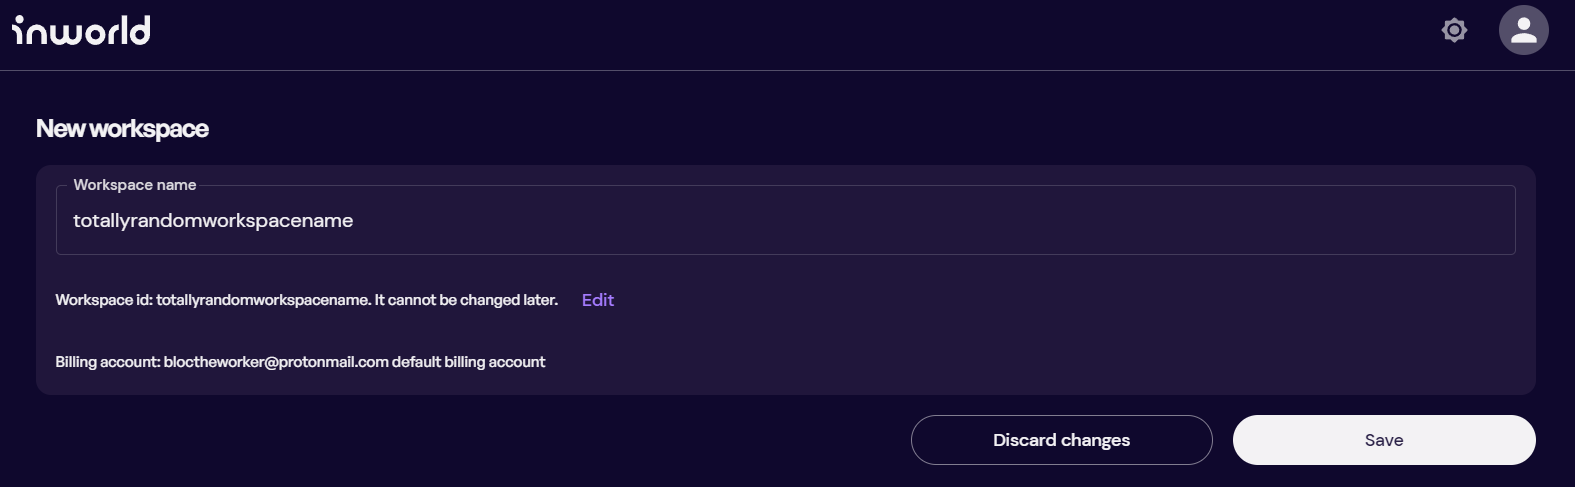
When you click to Save it will show a page like this. Congrats! You just created your workspace 🚀️

Step 4: Connecting Mod to Inworld System
Congratulations! You now have a mod, an Inworld account, and an Inworld Workspace. However, they don't know each other yet. So, we need to set up one last thing before we dive into exploring Skyrim.
Open your workspace (it should look similar to the picture above) and click on Integrations. Since this is your first time, you won't see anything on this page, but it should resemble the image provided. What you need to do here is click the big Generate new key button. This action will generate a secret, as shown in the image below. (Remember, your secret is confidential; don't share it with anyone!)

Now, keep this page open for a while; we'll need it. Go to the installation path of your mod (usually located at Steam\steamapps\common\Skyrim Anniversary Edition\Inworld). Inside this folder, you should find a .env file. Open this file with your preferred text editor (I used Notepad, but you can use any text editor you like). It should look similar to the example below.

Next, you'll need to replace the values as follows:
-
LOGIN_EMAIL: This is the email you used to sign up for Inworld. Make sure to enclose it within double quotation marks ("). -
LOGIN_PASSWORD: This is the password you used to sign in to Inworld. (Now you understand why I recommended signing up with an email option! 😄) -
INWORLD_KEY: This corresponds to theKeyvalue on the Integrations page that we left open a moment ago. Go to that page, click on the copy icon to instantly copy the value, and replace it here. Once again, ensure that you enclose it within double quotation marks. -
INWORLD_SECRET: Similar toINWORLD_KEY, but use theSecretvalue. -
INWORLD_WORKSPACE: This is the workspace ID of your workspace. If you didn't follow my advice and didn't take notes during the creation process, check the URL in your browser. It should look similar to this:https://studio.inworld.ai/workspaces/workspaceid22/integrations. In this case, the text betweenworkspaces/and/integrationsis your workspace ID. Use that ID here. -
DISABLE_VOICE: This is an optional setting. Use it if you want to disable Text-to-Speech functionality in the mod (in case you don't like the default voices). -
CLIENT_PORT: This is the port where the client will be opened. You don't need to modify this unless you encounter a "Port is in use" error. -
AUDIO_PORT: Similar to the Client Port, don't make any changes here if everything is functioning correctly.
Beware!
Make sure to enclose values in double quotation marks (e.g., "yourvalue") except for the DISABLE_VOICE part.
After making all the necessary changes, save the file. You're all set to go!